Level 0 — Orientation
Goal: open the Godot editor, recognise every part of the screen, add one node, save, and preview your scene. That is all. We go very slowly here and assume you have never opened Godot.
One tiny action per step. Do them in order. Where you see a ✓ Check box, make sure you can do that thing before moving on.
New words, defined as we go
This level introduces five words: editor, dock, node,
scene, and .tscn file. Each is defined the first time it appears.
They all reappear in the Glossary.
0.1 — Open Godot and make a project
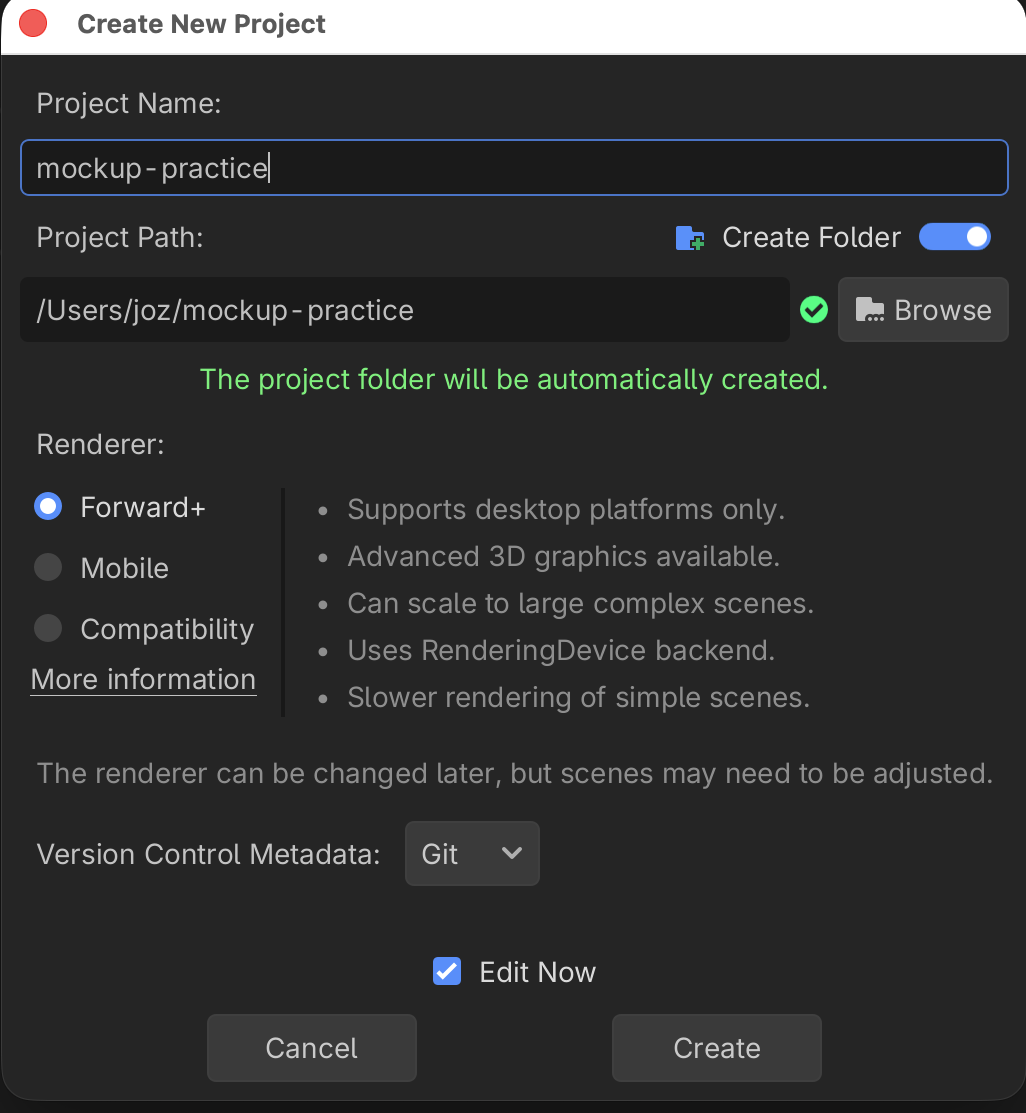
When Godot opens you see the Project Manager — a list of your projects.
- Click + Create (or New Project).
- Give it a name, e.g.
mockup-practice. - Click Browse and pick an empty folder for it to live in.
- Click Create & Edit.
The editor — the program where you build everything — now opens.
✓ Check you can do this
You can create a new project and reach the editor window. If Godot closed, re-open it; your project is now in the Project Manager list.
0.2 — Meet the editor: the four areas
Before touching anything, just look. The screen is divided into docks — a dock is a panel of tools attached to an edge of the window.
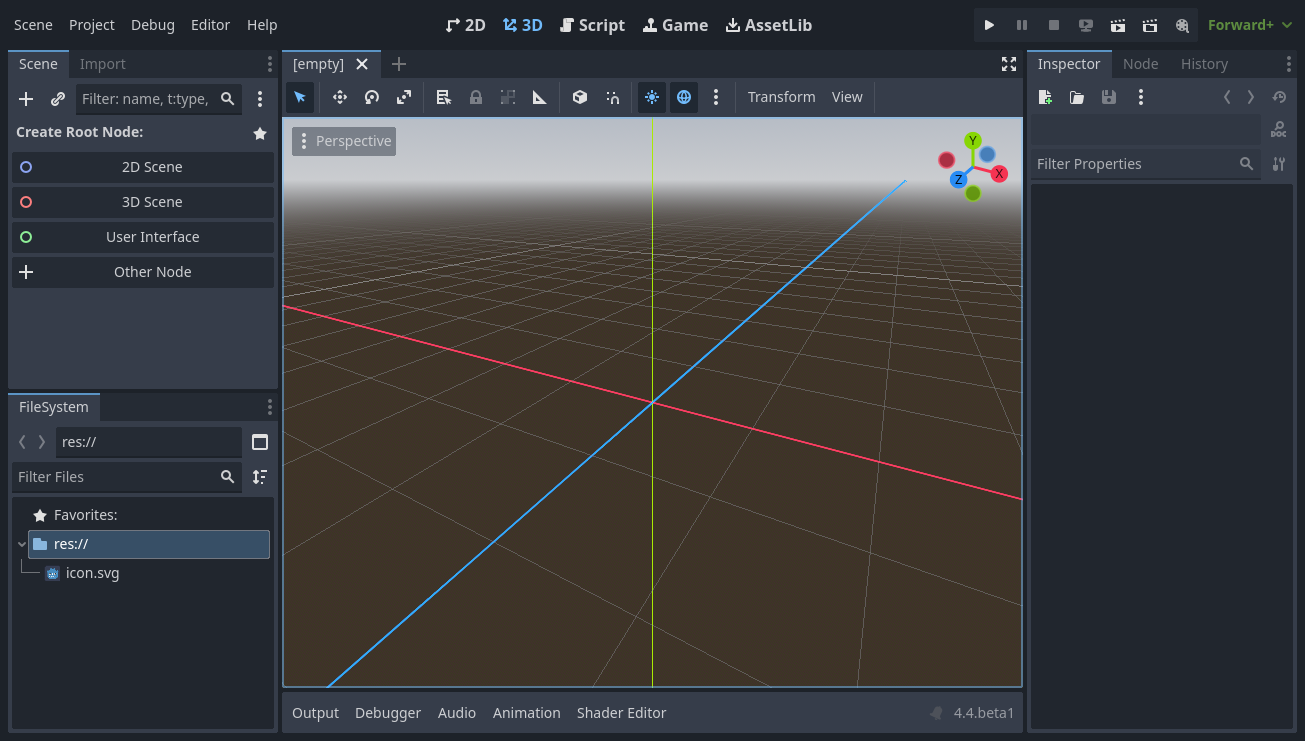
Above: the editor on first open. Image: Godot documentation, CC BY 4.0.
Find these four areas:
| Area | Where | What it is for |
|---|---|---|
| Scene dock | top-left | the list of nodes in the current scene (the "tree") |
| FileSystem dock | bottom-left | every file in your project |
| Viewport | centre | the picture of what you are building |
| Inspector dock | right | the settings of whatever node you have selected |
✓ Check you can do this
Point to the Scene dock, the FileSystem dock, the viewport, and the Inspector — by name — without looking at the table.
0.3 — What is a node?
A node is a single building block of your interface. One button is a node. One label is a node. One panel is a node. You build a screen by stacking nodes together into a tree, in the Scene dock.
That is the whole idea: a Godot interface is a tree of nodes.
0.4 — Create your first scene
A scene is one saved tree of nodes — usually one screen of your interface. Right now you have an empty scene. Godot asks what the root (top) node should be:
In the Scene dock, under Create Root Node, click User Interface.
Above: the “Create Root Node” choices. Choose User Interface. Image: Godot documentation, CC BY 4.0.
Why User Interface? Because it makes the root node a Control node — the kind built for on-screen interfaces. (More on Control in Level 1. For now: it is the right choice for a mock-up.)
✓ Check you can do this
Your Scene dock now shows one node at the top, with a small green icon. Green icons mean "this is a Control (UI) node." Good.
0.5 — Save the scene (and meet .tscn)
Save now, before doing anything else, so you never lose work.
- Press Ctrl+S (macOS: Cmd+S).
- Keep the suggested name or call it
main.tscn. Click Save.
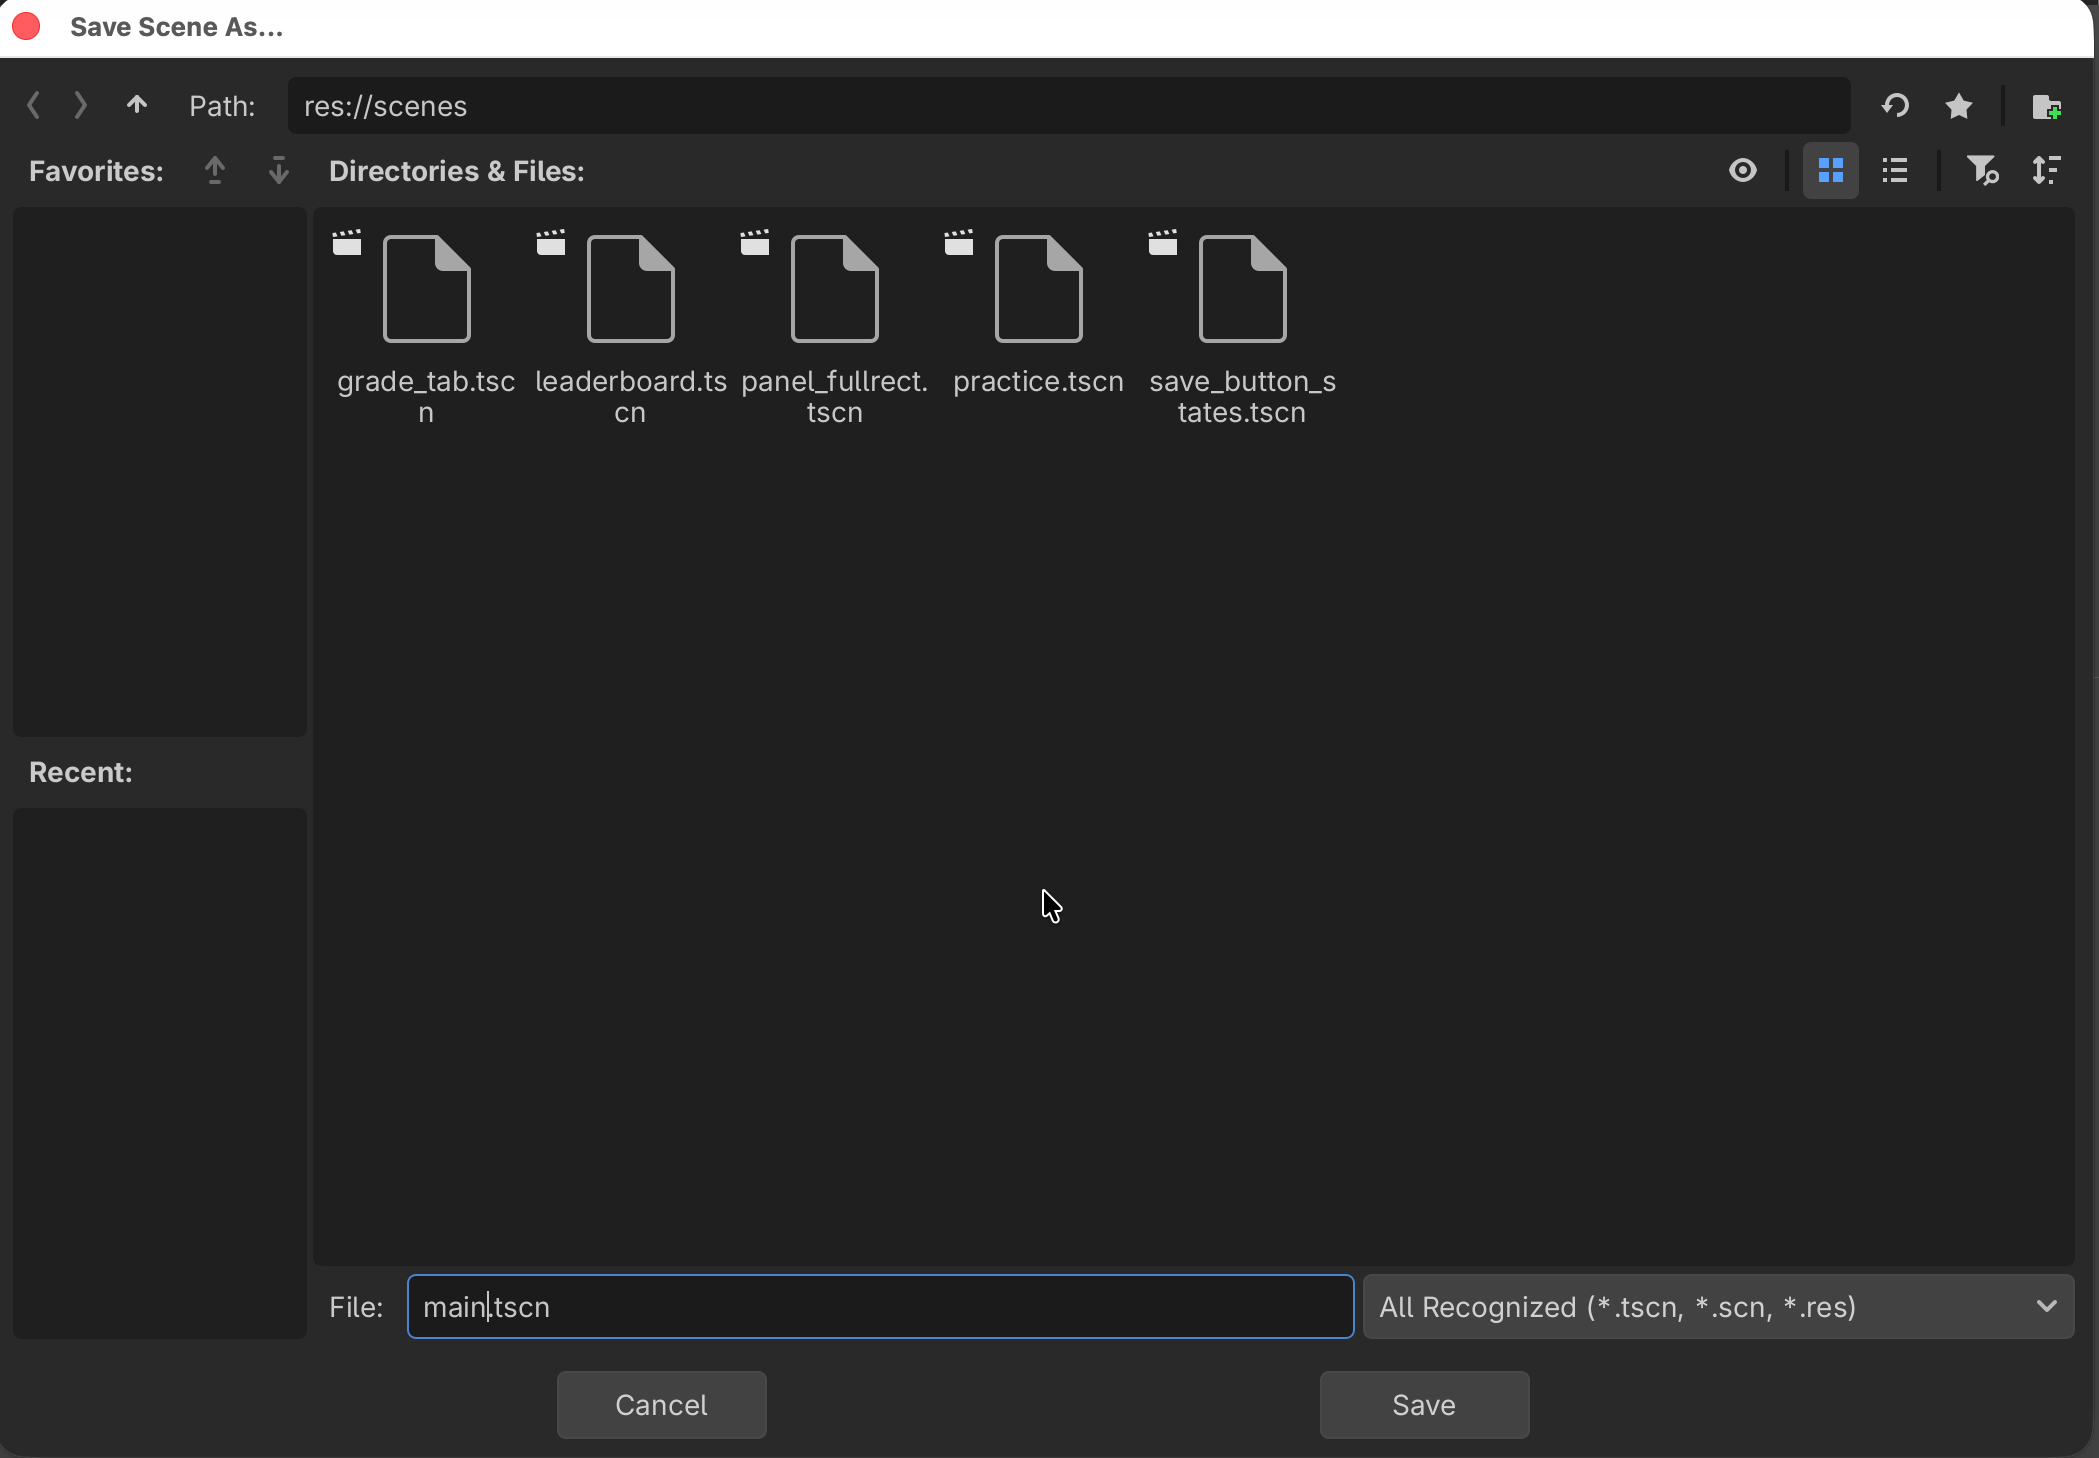
A .tscn file ("text scene") is how Godot stores one scene on disk. Look at
the FileSystem dock — main.tscn is now listed there. That file is your
saved layout.
✓ Check you can do this
main.tscn appears in the FileSystem dock (bottom-left). The scene tab at
the top no longer shows a (*), which means there are no unsaved changes.
0.6 — Add your first child node
A node placed under another is its child. Let's add a text label as a child of the root.
- Select the root node in the Scene dock (click it once).
- Click the + button at the top of the Scene dock (Add Child Node), or press Ctrl+A.
- The Create New Node dialog opens. In the Search box, type
Label. - Click Label in the list, then click Create.
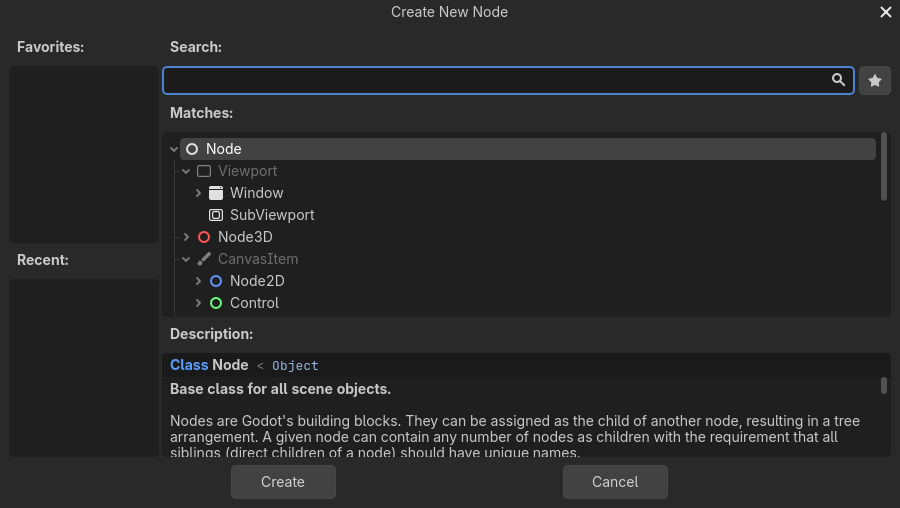
Above: the Create New Node dialog (here showing the top of the list). Type a name in Search to filter it. Image: Godot documentation, CC BY 4.0.
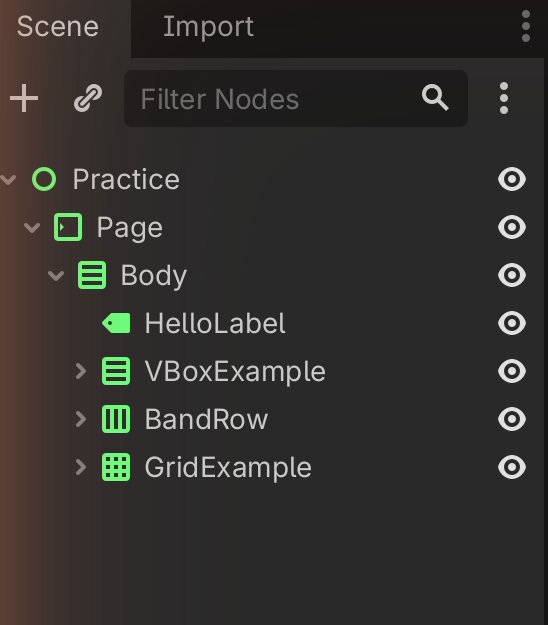
A Label node — a node that shows a line of text — appears in the Scene dock, indented under the root.
✓ Check you can do this
The Scene dock now shows Label nested under your root node. You added a child. This is the single most-repeated action in the whole tutorial.
0.7 — Meet the Inspector, and change one property
Whatever node you select, the Inspector (right) shows its settings, called properties. Changing a property changes the node.
- Click the Label node in the Scene dock to select it.
- Look at the Inspector. It now lists the Label's properties.
- Find the Text property and click its box.
- Type
Helloand press Enter.
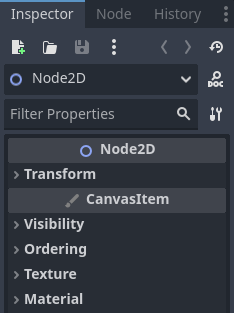
Above: the Inspector shows the selected node's properties. Yours will list a Text property near the top. Image: Godot documentation, CC BY 4.0.
The word Hello appears in the viewport.
✓ Check you can do this
You can (a) select a node and (b) find and change a property in the Inspector. Finding the right property in the Inspector is a core skill — almost every later step is "select a node, set a property."
0.8 — Preview the layout in a real window
You can open your interface in its own window to see it at real size. This is a preview — you are looking at the layout, not running any program logic (there is none; a mock-up has no code).
- Press F6 (Run Current Scene).
- If asked, allow it to run the current scene.
- A new window opens showing your
Hellolabel. - Close that window to return to the editor.

Out of scope
Pressing Play does not mean your mock-up "works" like an app — there is nothing to click and nothing happens, because behaviour needs code, which is out of scope. Preview is only for seeing the layout at real size.
✓ Check you can do this
A separate window opened showing your label, and you closed it again.
0.9 — Reopen a scene from the FileSystem dock
So you can always get back to your work:
- In the FileSystem dock, double-click
main.tscn. - The scene opens in the editor (it was already open here, but this is how you reopen one after closing it).

✓ Check you can do this
You can find main.tscn in the FileSystem dock and open it by
double-clicking.
✋ You can stop here and still be capable
You can now open Godot, name every dock, add a node, set a property, save, and preview. That is the entire editor loop. Everything in Level 1 is more of these same moves applied to building real layouts. Take a break if you need one — this is a real checkpoint.
Check Your Understanding
-
Name the four areas of the editor and what each is for.
Answer
Scene dock (top-left) — the tree of nodes in the current scene. FileSystem dock (bottom-left) — all files in the project. Viewport (centre) — the picture of what you are building. Inspector dock (right) — the properties of the selected node.
-
What is the difference between a node and a scene?
Answer
A node is one building block (a label, a button, a panel). A scene is a whole saved tree of nodes — usually one screen — stored as a
.tscnfile. -
You want to change the words shown by a Label. What two steps do you take?
Answer
(1) Select the Label in the Scene dock. (2) In the Inspector, find the Text property and edit it. "Select a node, set a property" is the move you repeat constantly.
-
Why does pressing Play not prove your mock-up "works"?
Answer
A mock-up is a picture of the interface with no behaviour behind it. Behaviour needs code, which is out of scope. Preview only shows the layout at real size.
Image credits
The editor screenshots on this page are from the Godot Engine documentation, © Juan Linietsky, Ariel Manzur and the Godot community, licensed CC BY 4.0. Placeholder images marked “screenshot to be captured” will be replaced with screenshots taken in our own editor.
→ Next: Level 1 — Foundations, the independence threshold.